
eSIM vs SIM Swap in Japan: Cost, Convenience, and Risk Guide

Every traveler arriving in Japan without a local phone plan faces the same fork in the road: swap your physical SIM card for a Japanese one, or install an eSIM before you even land. Both get you online, but they behave very differently once you’re standing at Narita or Haneda with a jet-lagged brain and a taxi to catch. This eSIM vs SIM swap Japan decision shapes your entire trip, from the first hour you land to the last photo you upload before boarding your flight home.
This guide breaks down exactly how each option works in practice: what a japan sim swap actually involves at a counter or vending machine, how eSIM installation compares in terms of speed and hassle, what each option really costs per gigabyte, and which type of traveler tends to be happiest with each choice. Rather than a vague list of japan esim pros cons, you’ll get a practical, side-by-side answer you can apply to your own trip. By the end, you’ll have a clear, practical answer rather than a pile of generic pros and cons.
The Two Ways to Get Local Data in Japan
Before comparing details, it helps to define both options clearly, since “SIM” and “eSIM” get used loosely in a lot of travel advice. These two remain the primary japan mobile data options for visitors without a Japanese carrier contract, so getting the distinction right matters before you buy anything.
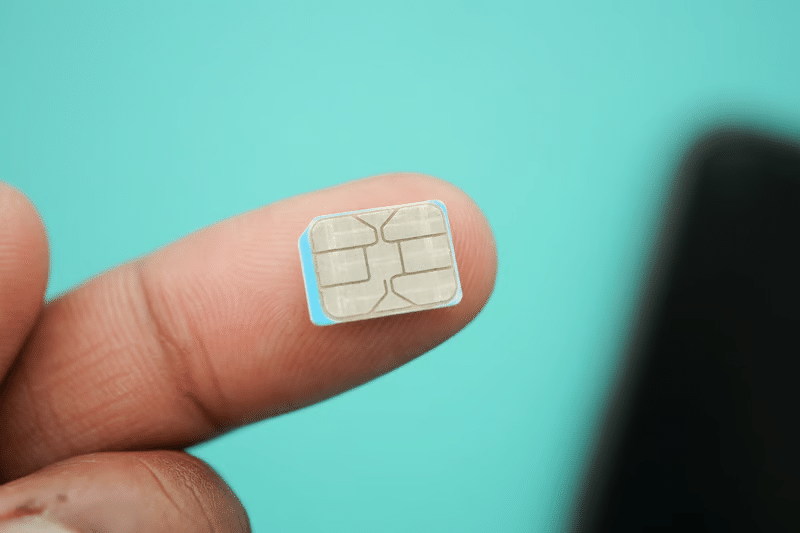
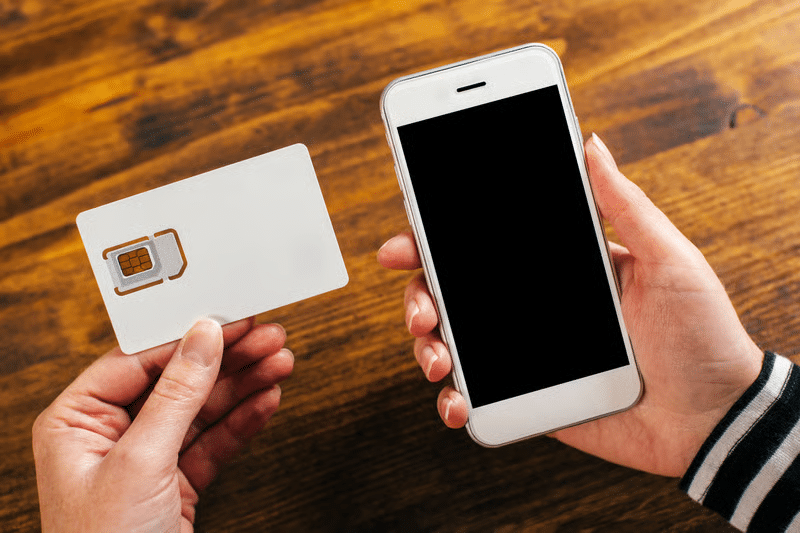
A physical SIM swap means removing your home country’s SIM card from your phone and replacing it with a small plastic Japanese SIM card, purchased at an airport counter, electronics store, or vending machine. Your phone then operates entirely on the Japanese carrier’s network using that physical card, and your home SIM sits in a pocket or hotel safe until you swap back.
An eSIM, by contrast, is a digital profile installed directly onto your phone’s existing eSIM chip — no physical card, no swapping trays, no risk of misplacing a tiny SIM tool. You typically install it before departure by scanning a QR code, and it runs alongside your home SIM rather than replacing it, so you can often keep receiving calls and texts on your original number while using Japanese data.
Both approaches ultimately connect you to the same underlying Japanese networks — NTT Docomo, SoftBank, and KDDI/au — so raw signal quality is rarely the deciding factor. The real differences show up in setup, cost structure, and flexibility, which is exactly what the rest of this japan esim vs physical sim comparison covers. Understanding these differences before you land, rather than while standing in an arrivals hall, is what actually makes this decision easy.
How SIM Swapping Works in Japan
Think of this section as a short japan sim swap guide in its own right: a traditional japan physical sim swap generally follows a predictable sequence, whether you’re buying at an airport counter or a convenience store rack.
The typical process
- Locate a vendor: Airport arrival halls, major electronics retailers (like Bic Camera or Yodobashi), and some convenience stores sell prepaid SIM cards for tourists.
- Choose a data plan: Most tourist SIMs come in fixed data allowances — commonly ranging from a few gigabytes up to unlimited data over a set number of days.
- Physically swap the card: You’ll need a SIM ejector tool (or a paperclip) to open your phone’s tray, remove your home SIM, and insert the new Japanese card.
- Confirm activation: Some cards activate automatically on insertion; others require a quick APN configuration step, which can be confusing for less technical travelers.
- Swap back before departure: At the end of the trip, you’ll need to remove the Japanese SIM and reinsert your original card — easy to forget if you’re rushing to the airport.
Where the friction shows up
This process introduces a few practical risks that any honest japan sim buying comparison needs to acknowledge:
- Losing your home SIM: A tiny card that’s easy to misplace in a jacket pocket or hotel drawer.
- No calls or texts on your home number: Since the physical SIM is fully replaced, you typically can’t receive calls or SMS on your regular number until you swap back.
- Physical damage risk: SIM trays and ejector pins are small and easy to lose or damage, particularly for travelers switching phones frequently between countries.
- Queueing and language barriers: Airport SIM counters can have long lines after international flights, and instructions aren’t always available in your language.
None of this makes a japan sim swap a bad option — for travelers who specifically want a fully separate Japanese number, or who are visiting for business reasons requiring a local contact number, it remains a legitimate and sometimes ideal choice.
Where physical SIMs are typically sold
Airport counters at Narita, Haneda, and Kansai International are the most common starting point, though prices there tend to run slightly higher than in-city electronics retailers. Bic Camera, Yodobashi Camera, and similar chains often stock a wider range of tourist SIM options at more competitive prices, along with staff who can usually walk you through the APN setup step. Vending machines selling prepaid data SIMs have also become more common in major airports, offering a quick, self-service alternative if counters have long lines after your flight lands.
How eSIM Installation Compares
The core appeal of an eSIM is that most of the friction above simply disappears. The japan esim setup process typically looks like this:
- Purchase online before your trip: You buy the eSIM plan from a provider’s website, often days or weeks in advance.
- Receive a QR code: This arrives by email, usually within minutes of purchase.
- Scan and install: Your phone’s camera scans the code, and the eSIM profile installs directly onto your device — no card, no tray, no tool required.
- Activate on arrival: Many providers let you activate the data plan only once you land in Japan, so you’re not burning through validity days while still packing at home.
- Keep your home SIM active: Because most modern phones support dual SIM (one physical, one eSIM), you can typically keep your home number reachable for calls and texts while using the Japanese eSIM purely for data.
This is where a japan esim guide differs most sharply from SIM-swap advice: the entire japan sim installation step for an eSIM happens digitally, meaning there’s no physical object to lose, forget, or damage, and no need to locate a vendor after a long flight.
A note on device compatibility
The one real prerequisite is a relatively recent phone that supports eSIM technology — most iPhones from the XS generation onward, and many Android flagships from the last several years, qualify. It’s worth double-checking your specific model before purchase, since older or carrier-locked devices in some regions don’t support eSIM profiles at all, and some carrier-locked phones purchased on installment plans block eSIM installation regardless of the device’s actual hardware capability.
It’s also worth checking whether your phone is genuinely unlocked, separate from whether it supports eSIM. A locked phone tied to a home carrier may refuse to activate any outside SIM profile — physical or digital — until it’s been unlocked, which is a step worth handling well before departure rather than discovering it at the airport.
Cost per GB, Convenience, and Risk
Any serious japan sim vs esim compared analysis needs to look past marketing and into actual cost structure, ease of use, and what could realistically go wrong with each option.
Cost per GB
Physical SIM cards and eSIMs are often priced similarly per gigabyte for comparable data amounts, since both ultimately run on the same three carrier networks. Where costs diverge is in the extras: physical SIMs sometimes carry a small hardware fee for the card itself, while eSIMs skip that cost entirely since there’s nothing to manufacture or ship. Bulk or long-stay pricing (covered in more depth in our long-stay eSIM guide) tends to favor eSIM providers, since digital delivery scales more easily for group and agency orders.
To put this in concrete terms: a traveler comparing a 10-day, 10GB physical SIM against a comparable eSIM plan will typically find the headline data price nearly identical, with the physical option occasionally costing a dollar or two more once the card fee is factored in. The gap widens for longer trips or larger groups, where reissuing physical cards adds cost and logistics that a digital eSIM simply avoids.
Convenience
| Factor | Physical SIM Swap | eSIM |
|---|---|---|
| Setup location | Must be done in person after arrival | Can be done before departure |
| Physical hassle | Requires ejector tool, tray access | None — fully digital |
| Home number access | Usually lost while swapped in | Often stays active via dual SIM |
| Return process | Must swap back before departure | No action needed at trip’s end |
Risk
The main japan sim risk with a physical card is loss, damage, or a forgotten swap-back before your flight home, potentially leaving you without your home number active for days afterward. A surprising number of travelers only realize they’ve forgotten to reinsert their home SIM once they’ve already landed back home and missed calls or messages start piling up. The main risk with an eSIM is device compatibility — if your phone doesn’t support eSIM, the entire method is off the table, making it worth confirming before you buy. Beyond that, eSIMs carry less physical risk simply because there’s no card to misplace, no tray to pry open with a bent paperclip, and no risk of static damage during the swap itself.
For most leisure travelers, this combination of comparable pricing, lower physical risk, and no need to hunt for a vendor after landing is why eSIM has become the default recommendation in most modern japan tourist sim comparison content — though, as the next section covers, it isn’t universally the right call for every traveler type.
Best Fit for Each Traveler Type
Rather than declaring one option a universal winner, it’s more useful to match the choice to your specific trip.
- First-time leisure travelers: An eSIM is usually the easiest starting point — install before departure, activate on arrival, and skip the airport SIM counter entirely. This matters most on a first trip, when jet lag and an unfamiliar train system already demand enough attention without adding a SIM-swap errand to the list.
- Business travelers needing a local number: A physical japan sim swap may be preferable if you specifically need a Japanese phone number for local contacts, deliveries, or reservations that require a domestic number format. Some restaurant reservation systems and courier services still expect a local number format, which an eSIM’s data-only profile typically can’t provide.
- Long-stay or slow travelers: eSIMs tend to win here too, thanks to easier renewal and top-up without needing to locate a physical retailer mid-trip, as covered in our long-stay Japan eSIM guide for two-to-four-week itineraries.
- Travelers with older or budget devices: If your phone doesn’t support eSIM technology, a physical SIM swap remains the only real option, regardless of preference. In this case, the japan sim risk of a lost or damaged card is simply a trade-off worth planning around, such as keeping the card in a zipped travel wallet.
- Group tours and travel agencies: Bulk eSIM provisioning is dramatically simpler to manage across a group than distributing and collecting physical cards from every traveler, since a tour operator can send activation codes digitally to each participant ahead of departure.
Weighing these against your own itinerary, device, and how much you value a local phone number is really what any japan esim decision comes down to in practice. For the majority of travelers reading this comparison, an eSIM turns out to be the japan esim best choice — but the exceptions above are real enough to check against your own situation before assuming that’s true for you.
Japan Sim Data Recommendations
For most visitors working through a japan esim buying guide checklist, eSIM plans typically offer the smoother experience without meaningfully higher cost. Japan Sim Data’s Day Pass, Plan, and Unlimited eSIM options run across NTT Docomo, SoftBank, and KDDI/au networks, giving the same carrier-level coverage a physical SIM would provide, without the airport queue or ejector tool.
For travelers who specifically want the japan esim ease of pre-trip setup, purchasing and installing the eSIM before departure — then activating it only once you land — is the most efficient path available. This also means you can troubleshoot any installation questions from the comfort of home Wi-Fi, rather than fumbling with a QR code on unfamiliar airport Wi-Fi with a dying phone battery.
And for travel agencies or tour operators managing group japan tourist sim types across an entire itinerary, bulk eSIM discounts remove the logistical burden of handing out and collecting physical cards for every participant. Instead of purchasing, sorting, and distributing dozens of physical SIMs before a tour departs — and collecting them again afterward — an operator can simply forward digital activation codes to each traveler’s phone ahead of time, with consistent pricing and coverage across the whole group. According to the Japan Tourism Agency, international arrivals have continued to diversify beyond major gateway cities, which is part of why reliable, easy-to-activate connectivity matters across a growing range of destinations, not just Tokyo and Osaka. For readers wanting more background on how eSIM technology itself works at a technical level, GSMA’s eSIM resources offer a useful, carrier-neutral overview.
Frequently Asked Questions
Q1: Is eSIM cheaper than a physical SIM swap in Japan?
A: Pricing per gigabyte is often similar between the two, but eSIMs frequently avoid small hardware fees tied to a physical card, and bulk or long-stay pricing tends to favor digital eSIM delivery.
Q2: Do I lose my home phone number if I use an eSIM in Japan?
A: Usually not. Most modern phones support dual SIM, letting you keep your home SIM active for calls and texts while your eSIM handles Japanese data separately.
Q3: What phones support eSIM for use in Japan?
A: Most iPhones from the XS generation onward and many recent Android flagships support eSIM. It’s worth checking your specific model before choosing this option over a physical SIM swap.
Q4: Is a physical SIM swap ever the better choice?
A: Yes — particularly for travelers who need a genuine local Japanese phone number, or those using an older device that doesn’t support eSIM technology at all.
Q5: Can travel agencies use eSIMs for group Japan trips?
A: Yes. Bulk eSIM provisioning is significantly easier to manage across a tour group than distributing and collecting individual physical SIM cards from every traveler.
Conclusion
Choosing between an eSIM vs SIM swap Japan setup mostly comes down to your device, your itinerary, and how much you value a local phone number versus a frictionless setup process. Physical SIM swaps still make sense for specific cases — business travelers needing a Japanese number, or anyone with an older device that simply can’t run an eSIM profile. For most leisure travelers, families, long-stay visitors, and group tours, though, the lower physical risk and pre-trip setup convenience of an eSIM tend to win out.
Japan Sim Data’s Day Pass, Plan, and Unlimited eSIM options across Docomo, SoftBank, and KDDI/au networks are built to make that decision easy, with bulk pricing available for travel agencies managing group connectivity. Whichever direction fits your trip, the goal is the same: reliable data from the moment you land to the moment you leave, without any unnecessary hassle in between, and without spending your first hour in Japan hunting for a SIM counter instead of your hotel.
If you’re still weighing the two options, take a moment to check your phone’s eSIM compatibility and your itinerary’s data needs before you decide — it’s a five-minute check that saves a lot of hassle once you’re actually in Japan.